
The Worthing HO Racing website is licensed under a Creative Commons Attribution 3.0
Unported License (except where otherwise noted) 2012-


Painting & fitting a lexan body
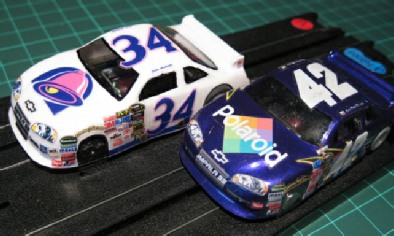
There are various ways to paint lexan bodies, but I’ll explain what I did to produce these Nascar bodies.
The method I used was to paint with a brush on the inside of the lexan shell and use peel 'n' stick decals on the outside.
The lexan shells I used were HOST bodies available from Lucky Bob’s in the US. There are other brands available too, giving a very wide choice of cars to model. I used Parma Faskolor paint f(or lexan bodies) and decals from Pattos Place.
For prepping the shells I used a little meths on some kitchen towel. And then rinsed with water and leave to dry.
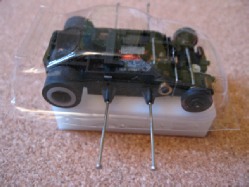
If I’m using pins to attach the body, I pin the shell before I paint and put sticky
dots over the wheels in line with the chassis -
When using spray paint or an airbrush, you’ll need to cut masks for the windows. When brushing, that’s probably unnecessary. I didn’t need masks with the Nascar bodies.
Now the painting…
I cover the outside with a plastic bag (or cling film) taped to the lexan base to avoid paint getting on the outside of the shell.
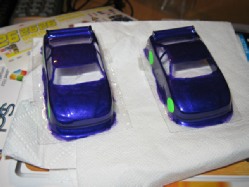
The number of coats depends on the type of paint, the method of painting and the result you want. Dark colours can be lightened with a backing of white paint. With brushing you need more coats and therefore use more paint, but on an HO car it's no big deal.
Drying between coats is important. See Pic 2. Using gentle heat from a lamp helps. With painting, practice makes perfect.
The third step is cutting.
I use some good-
I cut out the rear wheel arch, but leave the front one see-
Finally, I run a Dremel sanding drum round the wheel arches and (very gently) round other cut edges. It seals the cuts and prevents tearing.
The next stage is to attach the peel and stick decals. I work with a picture of the finished car in front of me, so I know where the decals should go. I work systematically from front to back. The good quality nail scissors are important here, as are a pair of curved tweezers. It can get fiddly.
Sometimes there is just no space for the ‘proper’ decals and I have to be a little creative to get the right look (see Pic 4).
Finally, the body needs to be attached to the chassis. There are body clips with
sticky pads made specially for the Tomy Turbo and Super-
For chassis with pin tubes (which can be fitted to any chassis -
-
Pic 1. Pinning the body
Pic 2. In between coats
Pic 3. Front wells cut for a Tyco X2
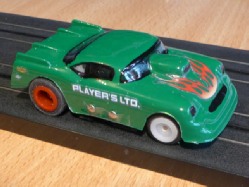
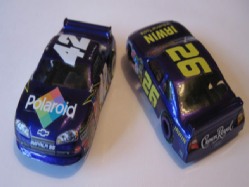
Pic 4. Finished bodies with decals added